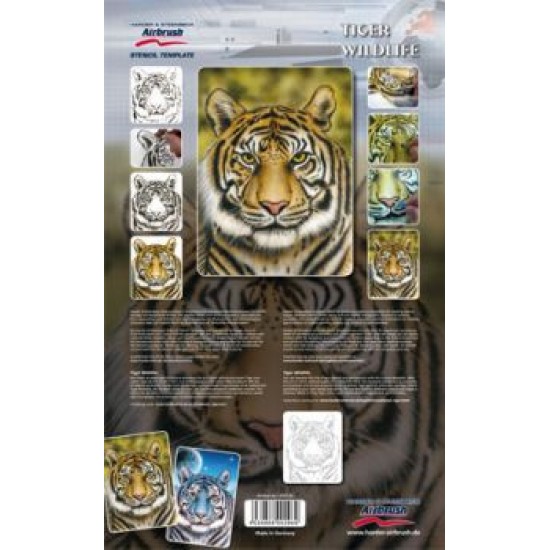
Buy Stencil Living nature, tiger whosale and retail

- Stock: In Stock
- Brand: TAGORE
- SKU: tagore_410130
Reusable stencils are a reasonable solution in airbrushing.
Harder&Steenbeck stencils are made of high-quality material resistant to aggressive solvents.
Template A4 format contains several elements at once.
Harder&Steenbeck reusable stencils allow you to save money. Having purchased once, you can use the templates many times.
Have fun!
Step-by-step instructions
Step 1
Lay out the 'Wildlife' stencil. A tiger on the surface of the picture. Use water to dilute pro-color HANSA Black in a ratio of 1 to 1 and apply this paint in thin layers. This paint can later be scraped with a scalpel to add fine details to the structure of the coating. Use weights or masking tape to fix the stencil in place.
Step 2
Here you see the intermediate stage when the stencil will be removed. Thanks to the stencil "Wildlife". The tiger' all important black areas for the tiger image were applied in a very short time.
Step 3
Spray transparent black paint on the black spots and areas of the coating, to make them softer. In addition, a little overspray on the picture will later serve to make additional wool textures visible. Also, spray short dotted lines in the direction of the hair growth on the black spots to show additional fur textures.
Step 4
Use an eraser to create light spots in a dark layer or to specify an additional layer texture. Always remember to erase in the direction of hair growth.
Step 5
Use the scalpel to create finer elements. Depending on the blade, gently scrape or scratch the fur structure in the direction of hair growth. This will gradually lead to a more realistic and fine structure of the fur.
Step 6
If desired, you can also use a black colored pencil to add additional thin tiger hairs. Always pay attention to the direction of hair growth.
Step 7
This is an intermediate stage at the moment.
< p>Step 8
Now give the tiger some color. Mix umber, yellow and water with a small drop of red to create an orange-brown color. Use this paint to paint the light areas according to our model. Make sure that some areas of the coating remain light and not stained. Use this paint to create shadows from the eyes to the nose so that the nose ridge appears.
Step 9
Then scratch a few more highlights into the fur. Make sure you don't damage the drawing pad.
Step 10
Make the color of the tiger more intense. Use umber to darken the shadows on the nose, eyes, around the ears and under the chin.
Step 11
Mix lemon yellow with water as a base. for tiger's eye. Carefully spray in thin layers. Since the paint is transparent, it won't be a problem if you spray a small amount on the black ring around the eye.
Step 12
Lightly spray the transparent umber on the iris eyes - a radial gradient is created. Then spray transparent black (i.e. pro-color HANSA Black + water) in the middle of the iris to make it even darker and softer.
When it is completely dry, use a scalpel to scrape off some light reflections and glare.
Step 13
Mix one drop each of fiery red, umber and lemon yellow with 5-10 drops of water for a reddish nose. Try this mixture first on a white test sheet. Do not use it on your work until you are satisfied with the color. Use an eraser to add more texture and highlights to the nose area.
Step 14
You can use a transparent umber to apply some spots on the nose - this will make it even more realistic.
You can also add mustaches at this step. Either scrape them off with a scalpel, or use a thin brush and white color.
The background has a blurred structure. Start with a transparent yellow-green shade, then use darker green-brown shades to create a background of spots and dots.
Step 15
You can use this set in combination with other sets of stencils to create your unique works.
